Decoder Suite - User Guide
The Navitas Decoder Suite consists of 6 tools, aimed directly at improving efficiency when providing GDS information to travellers/travel booker's.
Each tool is able to capture important information from the GDS, format and translate codes before placing it on the workstations clipboard, ready to be pasted in to an email, Word, Excel or any other document/system required.
Introduction
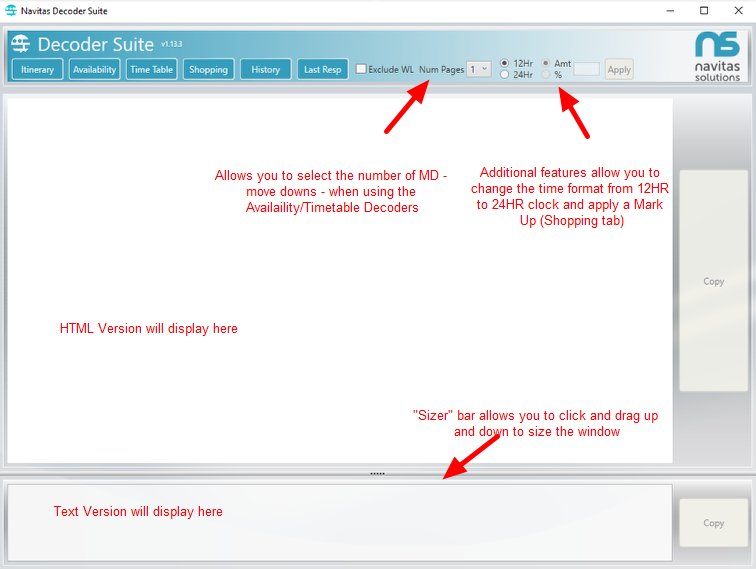
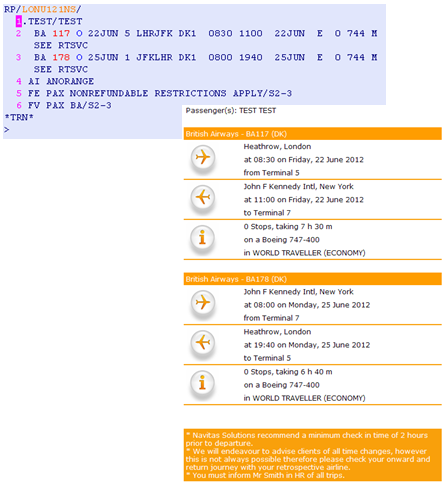
The Decoder Suite will then open. The suite consists of 6 tools - Itinerary, Availability, Timetable, Shopping, History and Last Reponse.
Information is displayed in both HTML and Text versions - the Text version being suitable for those who can not view in HTML format.
The Sizer bar allows you to click and drag up and down to size the window.
Best practice is to leave the Decoder Suite open, but minimised, when you are not using it.
Itinerary Decoder
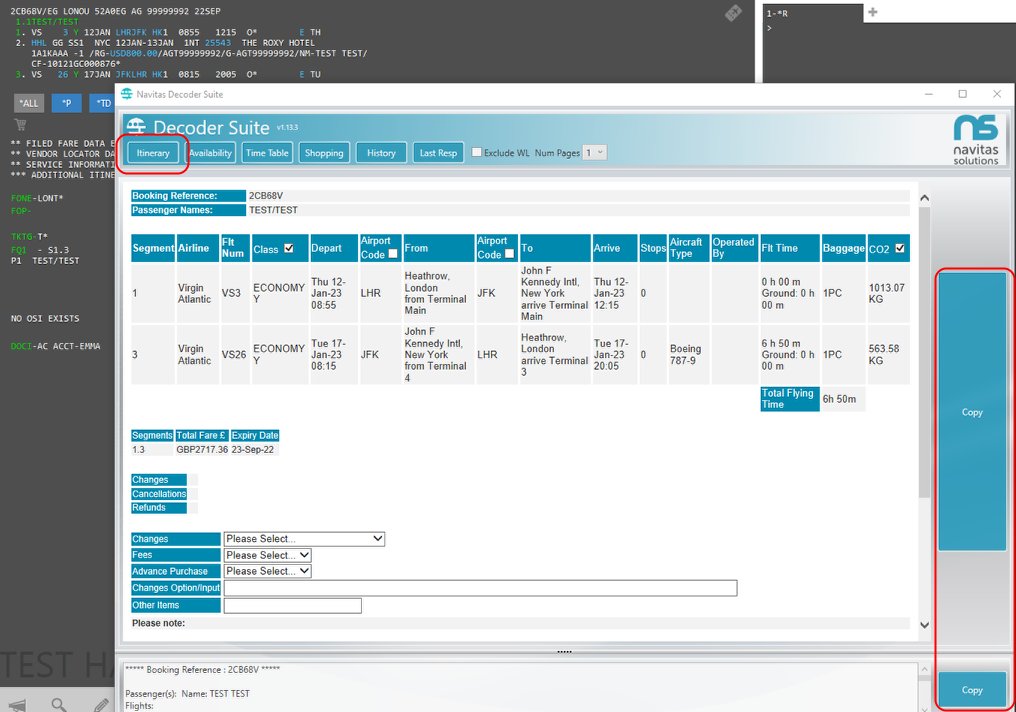
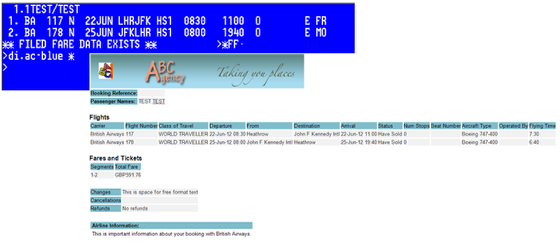
The Itinerary Decoder will extract a copy of the current PNR/Booking File. The tool will copy Flight, Air and Car segment information along with Fare details if required.
From a retrieved PNR/Booking File (*R, *A or RT) open the Decoder Suite and click the Itinerary button. Click the Copy button next to either HTML or TEXT format to capture the data on to the Window clipboard.
Availability Decoder
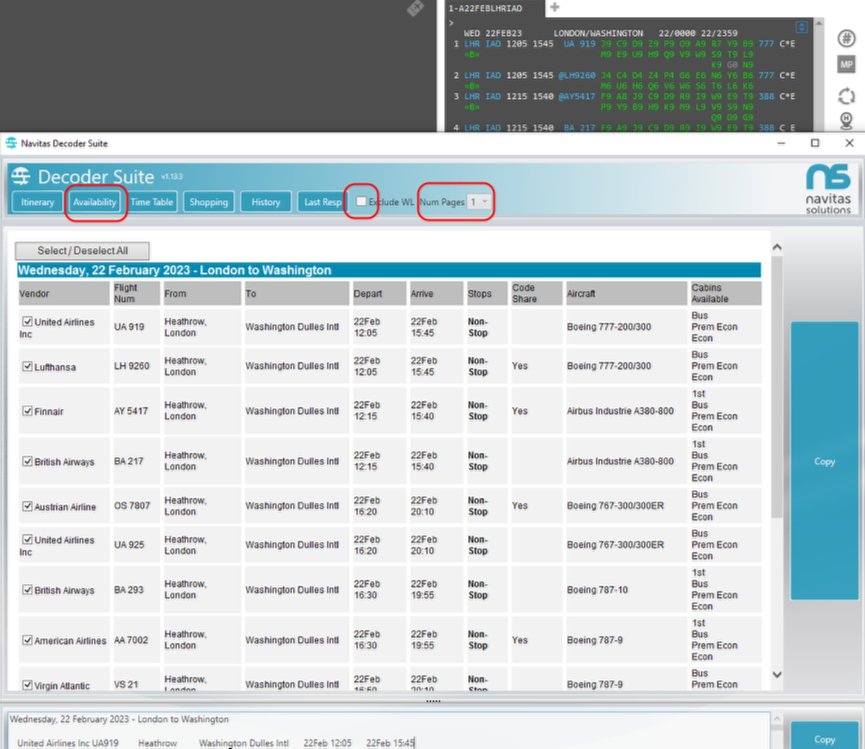
The Availability Decoder will read the response from the last flight availability request (A, 1 or AN) made by the user and decode each line. Up to 10 "move down" pages of information can be captured using the Num of Pages drop down. Make the relevant entry in the GDS, wait for the response to be returned then launch the Decoder Suite and click the Availability button.
The Availability Decoder will normally include classes that can be waitlisted as being available, however use the Exclude WL option to ignore any waitlisted classes.
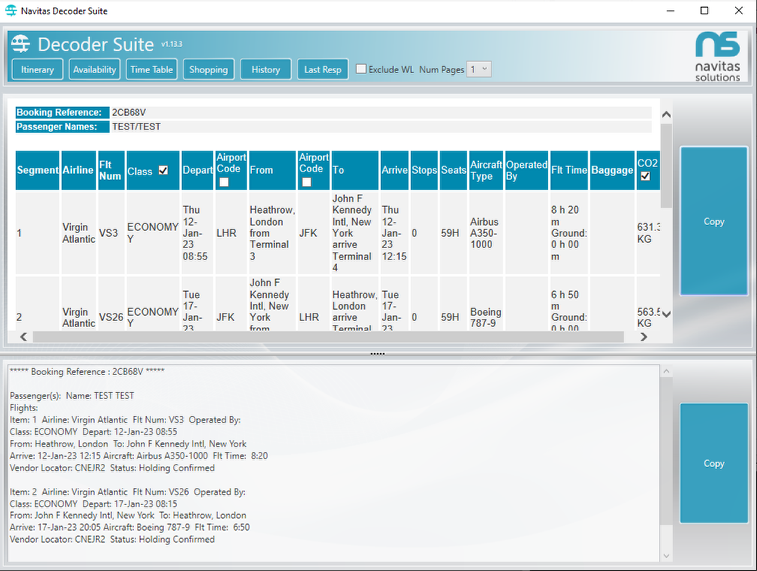
Availability Decoder - Row Selection
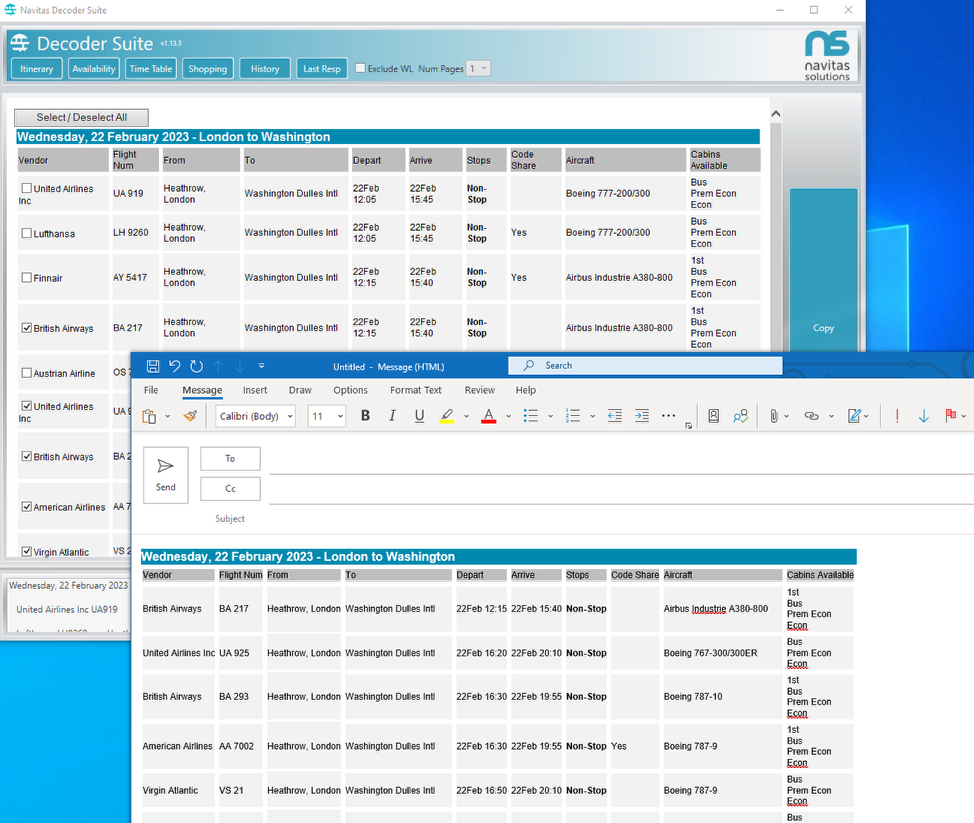
Row selection allows you to select from the Decoder Suite interface the information that you want to copy. All items are automatically selected to be copied, if you don't want to copy an item simply uncheck the tick box.
In the example above, we only want to send American Airlines, British Airways and Virgin Atlantic options so the other options have been unchecked. Then select Copy as before. When you paste only the selected items will have been captured.
Time Table Decoder
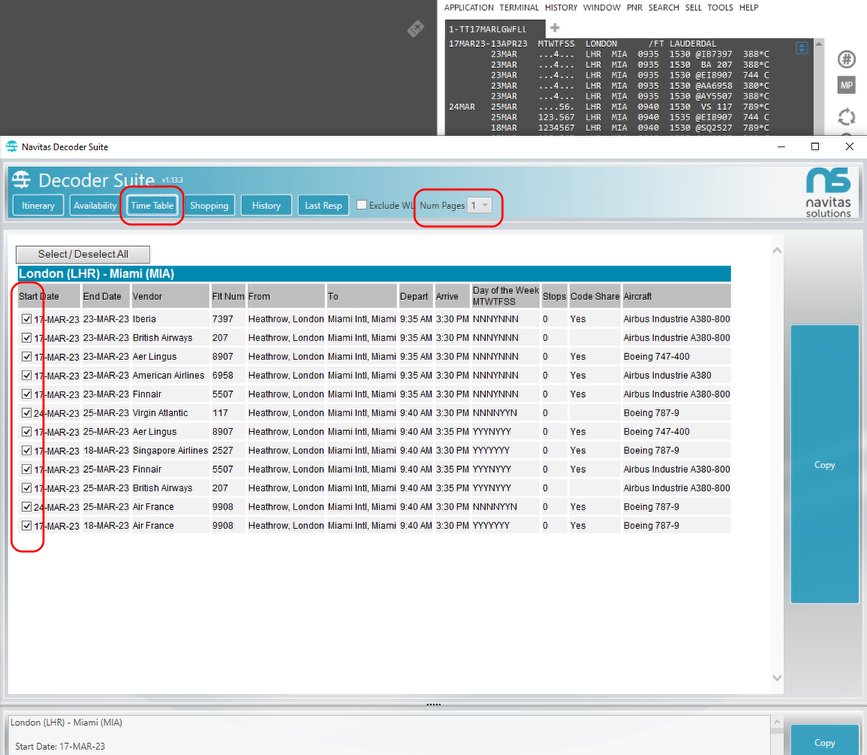
The Timetable Decoder will read the response from the last Timetable request made by the user (TT or TN) and decode each line. Again, up to 10 "move down" pages of information can be captured using the Num of Pages drop down. Make the relevant entry in the GDS, wait for the response to be returned then launch the Decoder Suite and click the Timetable button.
There is also the option to have row selection in Timetable Decoder - allowing you to only copy certain options.
Shopping Decoder
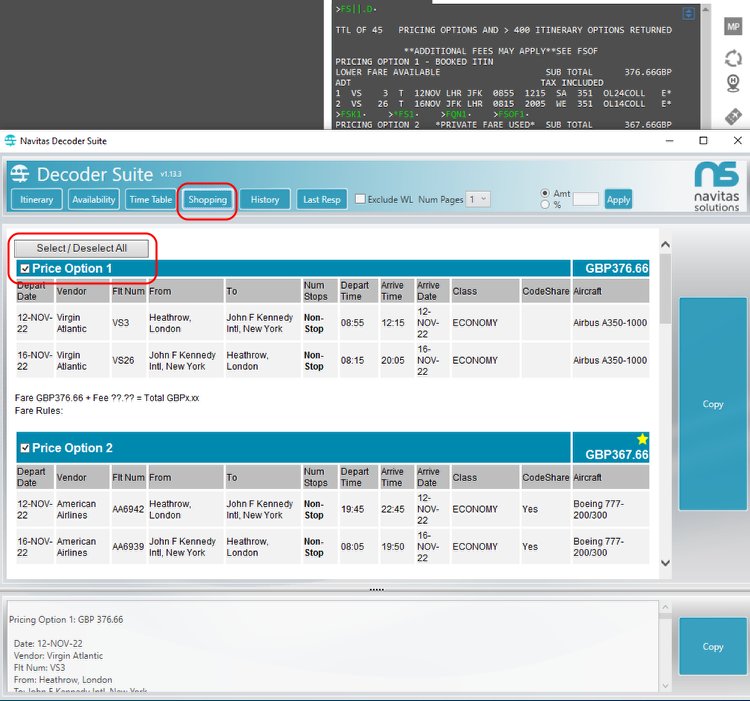
The Shopping Decoder is able to extract the response from an FS, WPNI or FXD request. The tool captures all the Pricing options and relevant Itinerary data allowing consultants to provide quick and easy quotes. Make the relevant entry in the GDS, wait for the response to be returned then launch the Decoder Suite and click the Shopping button.
As before you can have row selection added to your template to allow you to select the options that you wish to copy.
Shopping Decoder - Mark Up Feature
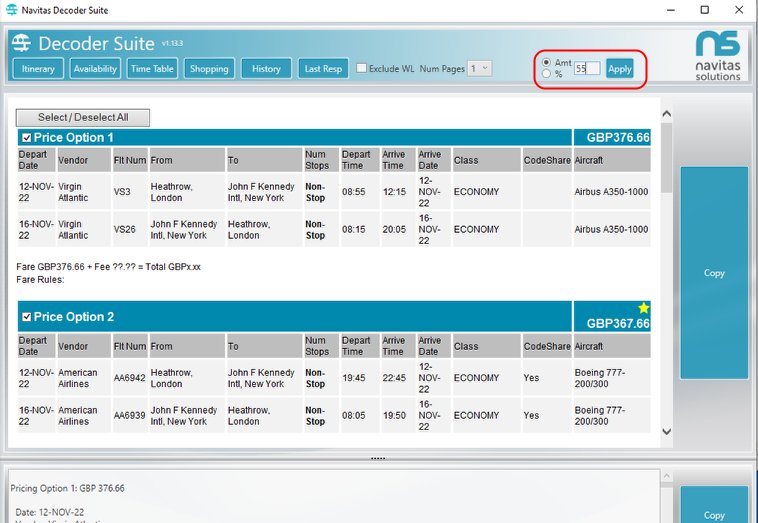
The Mark Up feature, available on the Shopping tab allows you to apply a mark up (amount or %) to the fares that have been captured following a Shopping request. Once you have made the entry, click the shopping button and then select either Amt or %, add the figure and then Apply. All fares will be updated by the amount specified. Then just copy and paste as before.
If you want to return the fares to their previous amount, simply enter a 0 in to the Amt % box and hit apply.
History Decoder
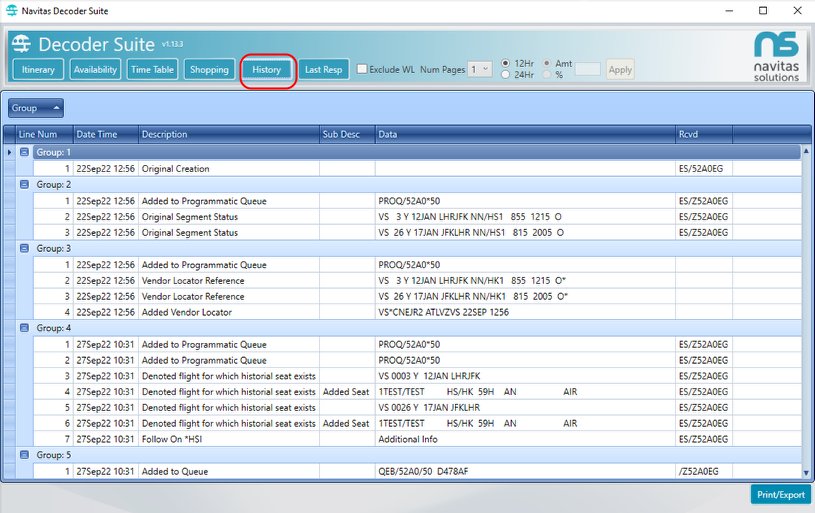
Reading booking file history has always been a challenge, but with this tool the process is made quicker and easier!
The tool captures the history of the current booking file on screen, decodes all of the information and presents it in a grid which allows sorting, grouping and filtering. All history codes are decoded and the relevant Received / Reference data and time stamp is shown.
Retrieve the necessary booking in the GDS then open Decoder Suite and click the History button. Booking file history defaults to being displayed by Group and is sorted in date order.
Sorting the display

The display can be grouped, sorted and filtered in a number of ways.
Each of the column headers can be used to sort the data by clicking the header itself - this will switch from A-Z to Z-A sorting and is shown by the small arrow head icon. Grouping the data is achieved by simply clicking and dragging the column header in to the top section of the interface. In the above screenshot we show how the display can be grouped to show all of the Received / Reference fields, allowing you to quickly view who touched the booking and the action they performed.
Information can also be filtered (using the filter funnel) allowing you to view only the information that you need. In the example above we filter the display to only show ADDED VENDOR LOCATOR.
Users can apply several grouping, filtering and sorting options to provide a wide array of display combinations.
Last Response
A brand new tool, 'Last Resp' will capture the last response from the GDS performing any MD entries required to capture the entire response. The resulting information is displayed using a 'pre-formatted text' template to ensure the spacing / tabs / formatting from the GDS is maintained
Pasting Captured Data
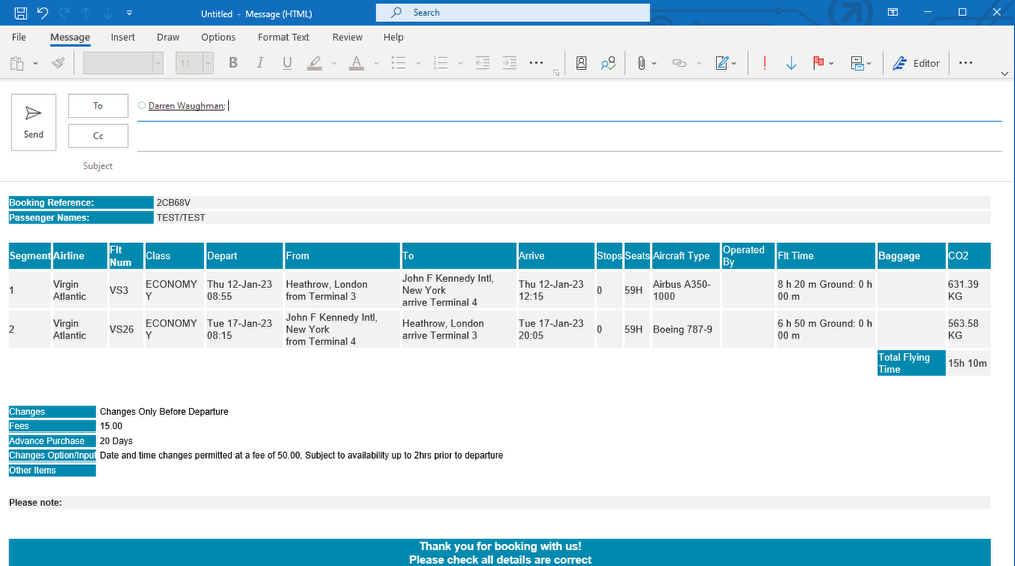
Once you have captured the data you can then paste in to any compatible document i.e. Email, Word, Excel by using normal entries, Ctrl + P. Once the output has been pasted in to the required document you should be able to edit as normal ie. remove column, type over information such as fare amount.
TEXT Format
The Decoder Suite output is displayed and available for copying in two options; HTML (at the top) and TEXT (at the bottom). The text format is suitable for those people receiving the output on a Blackberry, IPhone etc and also for those people who might have firewalls or another restriction that will block HTML formats.
Customisation Options
The Navitas Decoder Suite provides customisable layouts of information based on Office ID/PCC, Account Number or Customer Profile. Customisation options include; inclusion of corporate logos, matching corporate colours, removal / rearranging of information, automatically appending Terms and Conditions text, etc.
Free format boxes can be added (see below) so consultants can enter their own text once pasted in to the email. This is useful for fares rules etc and ensures standardised presentation of data to clients.
Logic can be applied to templates so certain text only appears in specific scenarios - for example apply BA specific text only when BA flight in Itinerary, or apply VISA text when travel is to certain destinations only.
Did you know...?
- You can now display CO2 amounts - providing your customers with details of the CO2 emissions, either using the GDS calculation* or via Thrust Carbon with our clever integration!
- Useful drop downs can standardise text that is sent to your clients and save your consultants even more time with typing information in to emails!
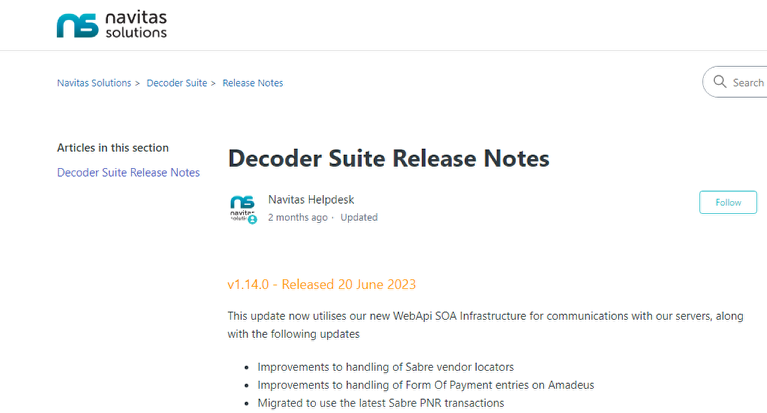
To review all recent enhancements please visit https://navitas.zendesk.com/hc/en-us/articles/200544469-Decoder-Suite-Release-Notes
*capture from GDS is subject to GDS functionality