PNR Watcher 3.0 - Installation
Installation
Before You Begin
Recommended Procedures
** In order to preserve the users, departments and rules created it is essential that the database is regularly backed up. At the most basic level the PNR Watcher.mdb file should be copied and stored in a different location at a regular interval. Ideally the database should be located on a network server that is automatically backed-up on to removable media on a regular occurence.
!! If you do not follow this advice, you could loose all the rules stored in the database. Navitas Solutions will not be held responsible for any loss of data. It is your responsibility to ensure your data is adequately protected !!
** Ensure only one PNR Watcher database is installed for the site. Do not repeat the database installation. If the installation is repeated, and the new database installed in to the same directory as your existing database, all rules will be lost, and your database will be overwritten with a new, blank version.
Please refer to the Important Information here before proceeding with an updates/upgrades
Installing PNR Watcher
If installing PNR Watcher for the first time, to avoid any installation errors it is advised that you install the database first. If using a machine that will also have the PNR Watcher Administrator module and/or the Agent desktop components, these can also be installed at the same time.
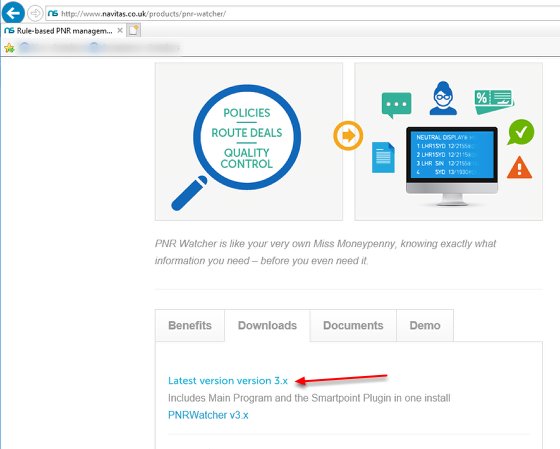
Run the PNR Watcher download file from our website http://www.navitas.co.uk/products/pnr-watcher/. Click on the Latest version download.
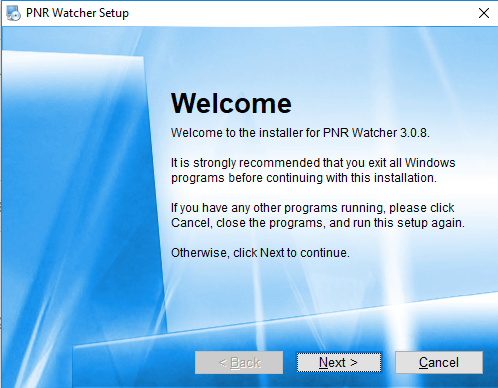
The Welcome screen is displayed. Click [Next] on the Welcome screen to begin the installation.
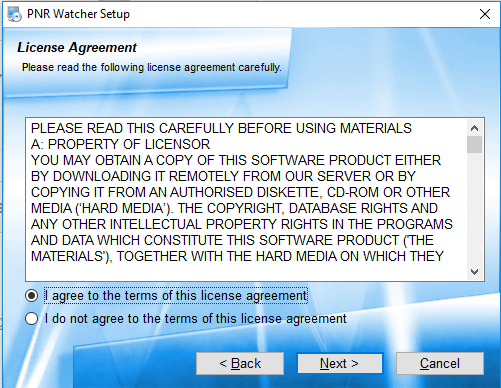
Tick the radio button to agree to the terms of the licence agreement.
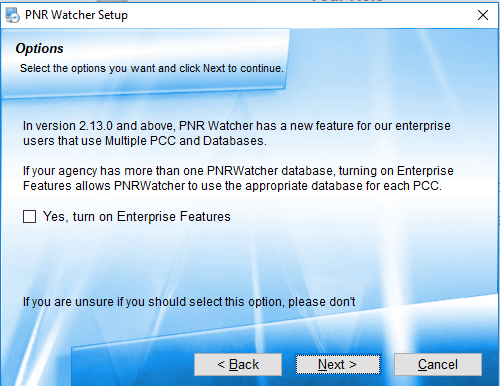
In the latest version of PNR Watcher we have introduced a new feature for our Enterprise users. If you are an Enterprise user and want PNR Watcher to use the appropriate database for each PCC then you should check this option.
The Enterprise fearure allows you to combine a "Head Office" rules database with the local branch offices database, meaning you could maintain a set of company wide rules at HQ while still allowing branches to create their own rules.
If you are unsure on this screen then please speak to us!
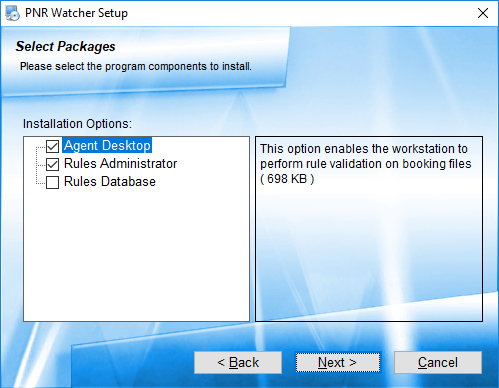
Select the components to install using the Select Packages screen.
* If installing on an agents desktop, select the first option.
* If installing on a Rules Administrator machine, click the second option. This will install the PNR Watcher administration module which gives the user the ability to modify the PNR Watcher database to create/delete rules, users and departments. If the workstation is also a reservations terminal, click the Agent Desktop option also.
* The Rule Database option will install a blank copy of the PNR Watcher database - remember to only use this option once, on the first installation!
Click [Next] once all selections are made.
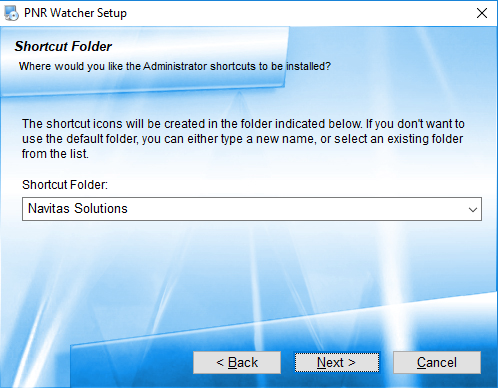
The Shortcut Folder screen appears and allows selection of the Start menu folder where the shortcut to the PNR Watcher Rule Administrator module is created (if installed). Accept the default folder and click [Next].
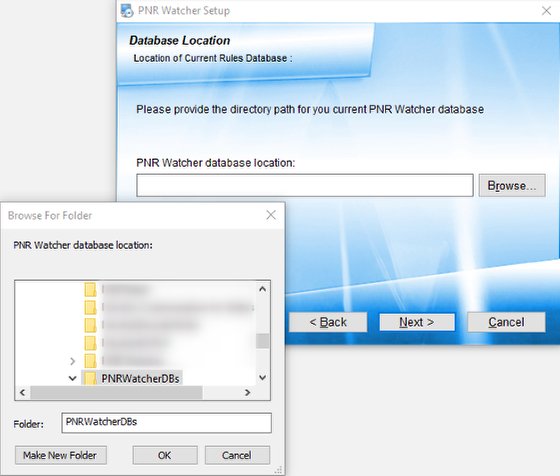
The next screen is concerned with the location of the PNR Watcher database. If the Rules Database option was selected in the "Select Packages" screen, it will ask for the location where the database should be installed. If the Rule Database option was not selected on the "Select Packages" screen, this screen asks for the location of the EXISTING database.
Click [Browse...] and navigate to the location where the PNR Watcher database will be (or was) installed. Click [Next] once completed.
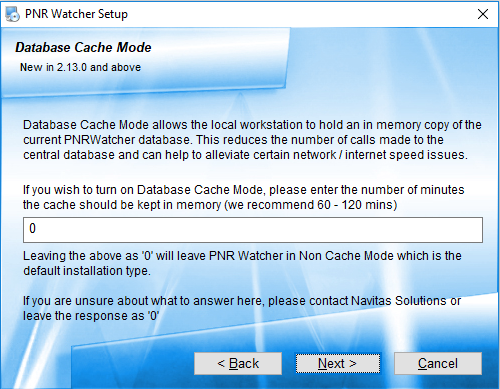
In the latest version of PNR Watcher we have introduced a new feature - Database Cache Mode. This allows the local workstation to hold a copy of the PNR Watcher database in memory - reducing the number of calls made to the central database. This can help alleviate certain network or internet speed issues.
If you wish to take advantage of Database Cache Mode then simply enter the number of minutes the cache should be kept in memory i.e. 60 minutes.
Leave as 0 (zero) for a default installation type (non Cache Mode).
If you are unsure on this screen then please speak to us!
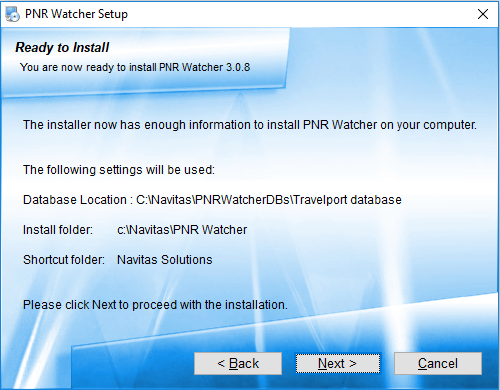
A summary Ready to Install screen is displayed, listing all the options selected during the previous steps.
Click [Next] to proceed.
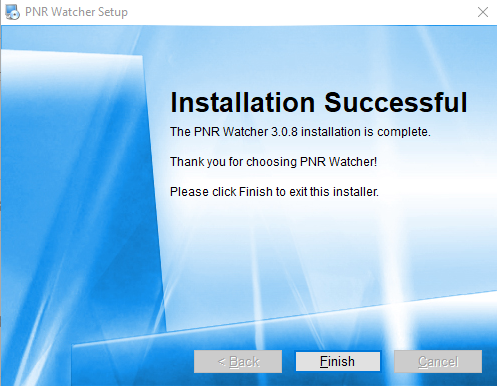
Once complete, the Installation Successful screen appears. Click [Finish] to exit the installation program.