Rule Actions Explained
Each rule can be assigned with up to 3 separate actions to perform once the rule has been matched. Each action is defined on its own tab within the Rule-Action area.
Select the required tab and use the drop down list to select the appropriate action required. The right hand side of the tab changes indicating the appropriate data required by each action.
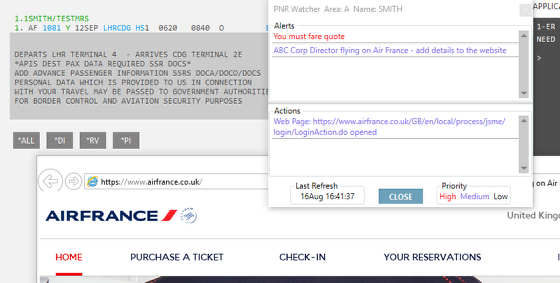
Display Alert
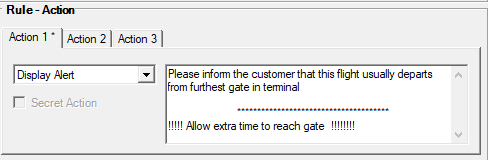
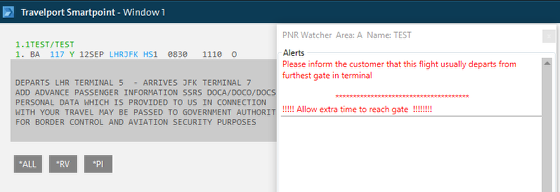
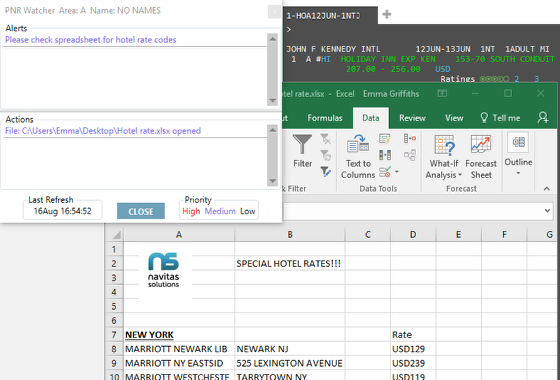
The Display Alert action is used to display information to the consultant when a rule has been matched.
Select Display Alert from the drop down list. The tab changes to show a large field used to enter the information to be displayed.
Useful - you can use special characters such as ******** !! to highlight important text.
Prompt For Input
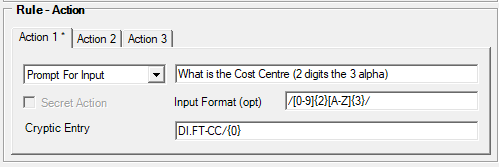
Prompt for Input is used to ask the consultant a question and then input the answer they provide in to the booking file in a specified cryptic entry.
Select Prompt For Input from the drop down list. The tab changes to show three boxes - the top box is used to enter the question to ask the consultant, there is an optional box to allow the specification of a pattern the users input must match and the bottom box to tell PNR Watcher the cryptic entry that should be used.
As in other areas of PNR Watcher we use the power of Regular Expressions to specify the entry format.
In the Cryptic Entry box enter the format of the entry that you wish PNR Watcher to make. Use {0} - first answer {1} - second answer {2} - third answer, etc to show where the answer to the question should be inserted.
You can ask multiple questions if you need to create a multiple value entry i.e what is the cost centre, project code and vessel name? The Cryptic Entry would be formatted as follows: DI.FT-CC/{0}-PC/{1}-VN/{2}. Multiple fields are entered on the User Input box using a comma to separate i.e. 1234, TT00123, Neptune. This would be entered as DI.FT-CC/1234-PC/TT00123-VN/NEPTUNE.
You can ask one question, and input the response in multiple enrties or fields. To reuse an entered field, administrators can simply replicate the fields 'number' in the string format, for example What is the Booker Name? the response can be entered as a DI and NP entry by using DI.FT-BN/{0}+NP.BN*{0} (use + or | depending on your keyboard)
Useful - make the question as detailed as possible so less room for user error.
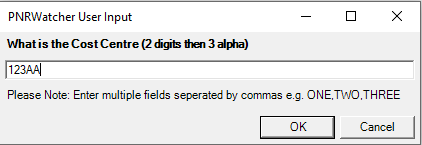
The consultant is prompted with a User Input box, and the response that they give is formatted in to the booking file in the correct format.
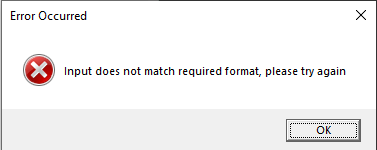
If a input format pattern has been specified and the input does not match the required format, the user will be prompted to try again
Once the entry has been inout, PNR Watcher responds with: Cryptic Entry: DI.FT-CC/TP12 sent and the booking file is updated.
Select From Table
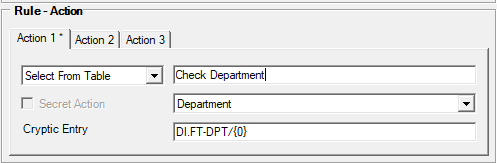
Select From Table is used to prompt the consultant to select an item from a list of options (provided in a predefined table - see Tables) The value selected is then entered in to the booking file in a specified cryptic entry.
Choose Select From Table from the drop down list. The tab changes to show three boxes - the top box is used to enter the prompt to be displayed, the middle box shows all of the tables currently configured in PNR Watcher and the bottom box is used to tell PNR Watcher the cryptic entry that should be used.
In the Cryptic Entry box enter the format of the entry that you wish PNR Watcher to make. Use {0} - first answer, to show where the value should be inserted.
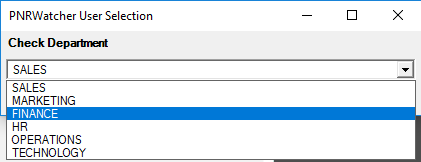
The consultant is prompted with a User Selection box, and the value that they choose is formatted in to the booking file in the correct format.
PNR Watcher responds with: Cryptic Entry: DI.FT-DPT/A4 sent in the Actions area, and the booking file is updated.
If the user has not made a selection, the Actions area reflects this decision, ACTION FAILED - No Selection made for entry DI.FT-DPT/{0}
In this example the Text displayed to the consultant and the value entered in to the DI field is different - refer to Tables for more information.
Make Entry
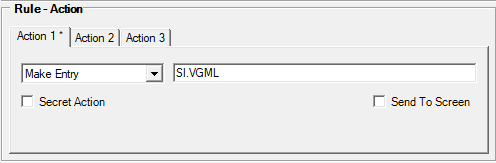
The Make Entry action automatically sends any cryptic command to the Galileo host.
Select Make Entry from the drop down list and enter the full Galileo format in to the field provided.
Once a rule has been matched, the entry is submitted in to the booking file.
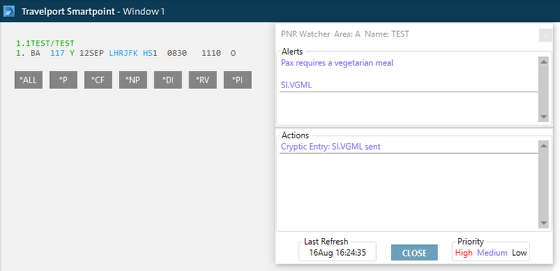
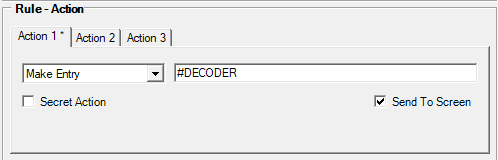
PNR Watcher has been enhanced to allow administrators to mark a 'Make Entry' action to be performed 'On Screen' in Travelport Smartpoint.
This is handy if you are programming rules that make faring (i.e. FQBB) entries, or to trigger a Smartpoint QuickCommand (i.e. #DECODER)
Stop Cryptic Entry
The Stop Cryptic Entry is a powerful control action that can stop Trigger Entry, Ticketing and Ending commands from being submitted to the Galileo host.
Rules can be written that check booking files for specific information, such as purchase order number and can stop the booking from being Ended or Ticketed if this is not present.
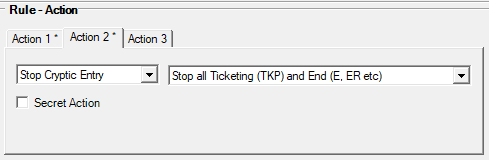
Select Stop Cryptic Entry and three options are made available.
1. Stop Trigger Entry - use this option to stop the Entry Triggers that are specified on the Details tab from being submitted to Galileo.
2. Stop all Ticketing (TKP) - use this option to allow booking files to end but to stop all TKP type entries if the rule is matched.
2. Stop all Ticketing (TKP) and End (E, ER etc) - this option will stop all TKP and Ending entries from being submitted to Galileo when the rule is matched.

Launch Application
The Launch Application action can run any application (.exe) when a rule has been matched. This is useful when wishing to integrate third party applications into a quality check routine.
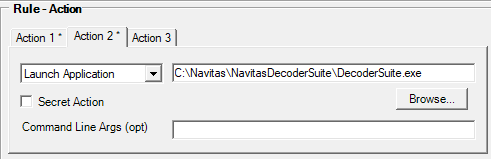
Select Launch Application from the drop down list. Two fields are made available.
The first must be configured with the full path to the application to be run. The second field can be used to specify any command line arguments required by the application.
To locate the path of the application, click Browse.
The Open dialog is displayed. Use explorer to navigate and select the required applications exe file, double clicking on the file, or selecting the file and clicking Open.
The Open screen closes and the full path displays in the Rule Action section.

Open Web Page
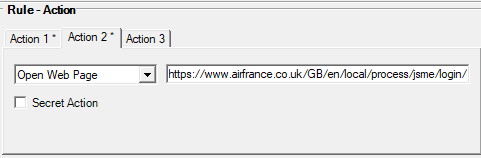
The Open Web Page action will automatically open Internet Explorer and navigate to a specified URL.
Select Open Web Page from the drop down list. The URL entry field is displayed, prefilled with http:// - complete the field with the full internet path.
Open Word Document
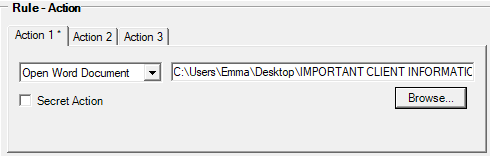
The Open Word Document action automatically starts Microsoft Word and opens the specified document.
Select Open Word Document from the drop down list then specify the full path to the required .doc file.
To locate the word document, click the Browse button.
The Open dialog is displayed. The Files of type is set to filter for *.doc files only.
Use explorer to navigate to the required document, select the file and click Open. Alternatively, double click on the file name once found.
The Open screen closes and the full path is entered into the field.
Important - ensure the document is stored in a central location that can be accessed by all PNR Watcher users.

Open Excel Workbook
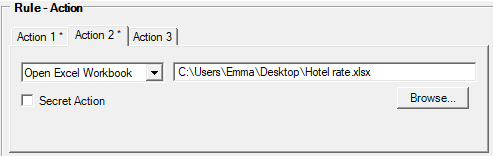
The Open Excel Workbook action is able to launch Microsoft Excel and open the specified spreadsheet workbook file.
Select Open Excel Workbook from the drop down list. In the field provided, enter the full path to the xls file, or click Browse to navigate to the file.
The Open dialog displays, filtered to display Excel xls files, using the Files of type.
Navigate to the required folder and file, double clicking on the xls file.
Once selected, the Open dialog closes and the full path is entered into the action field.
Open Other File
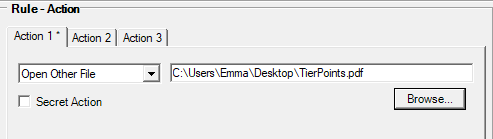
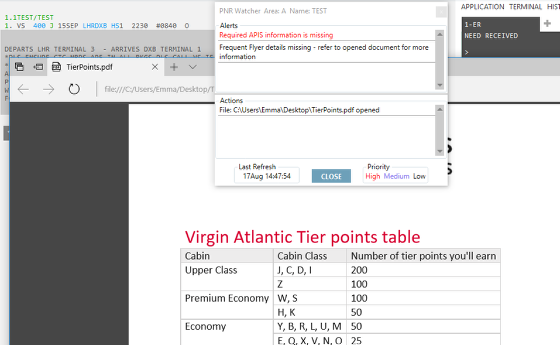
The Open Other File action uses the Windows file type associations to open the required application for various file types, such as TXT or PDF files.
The file to be opened must be correctly associated with an application in Windows File Type associations, failure to do so can produce unexpected results.
Select Open Other File from the drop down list and then provide the full path to the file to be opened. To navigate to the file, select Browse.
The Open dialog is displayed. Use explorer to navigate to the required folder and file. Double click the required file, or single click and select Open.
The Open dialog closes and the full path is entered into the appropriate field.
XML Handoff
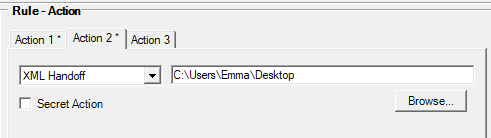
The XML Handoff action is used to hand off the contents of the current booking file to any third party system that can read from XML files.
The XML Handoff action must be configured with the hard drive folder path where the xml files should be saved.
Click Browse.
The Browse For Folder screen displays. Use the tree folder view to location and select the folder to save the files.
The files are saved in this folder using the following filename format:
yyMMddHHmmssf.xml
where:
yytwo digit yearMMtwo digit monthddtwo digit dateHHhour (24 hour format)mmminutesssecondffraction of a second
example:
0605281356036.xml
